Every website owner wants their website to load faster and be more secured. That’s where free CloudFlare CDN account can help you with all of these things. It takes to setup 5 minutes and can give your website positive outcome.
Table of Contents
What is Cloudflare CDN?
CloudFlare CDN is a content delivery network or in short CDN. In Web Hosting industry you can hear this term a lot. For most basic needs, CDN will help you to load your website faster from all around the globe. As it caches your website in different parts of the world, allowing to load it quicker for incoming traffic to your website.
Setting up CDN for your website helps you with:
- Website Speed Performance
- Additional security layer
- CloudFlare CDN also offers a free SSL certificate
- Additional layer against DDoS attacks
What you’ll Need Before You Start
Below is a short list of what you’ll need to setup CloudFlare CDN free account:
- A domain name (website should already be created under that domain name)
- Access to where you’ve purchased your domain
- 5 minutes of your time
Step-by-Step Guide
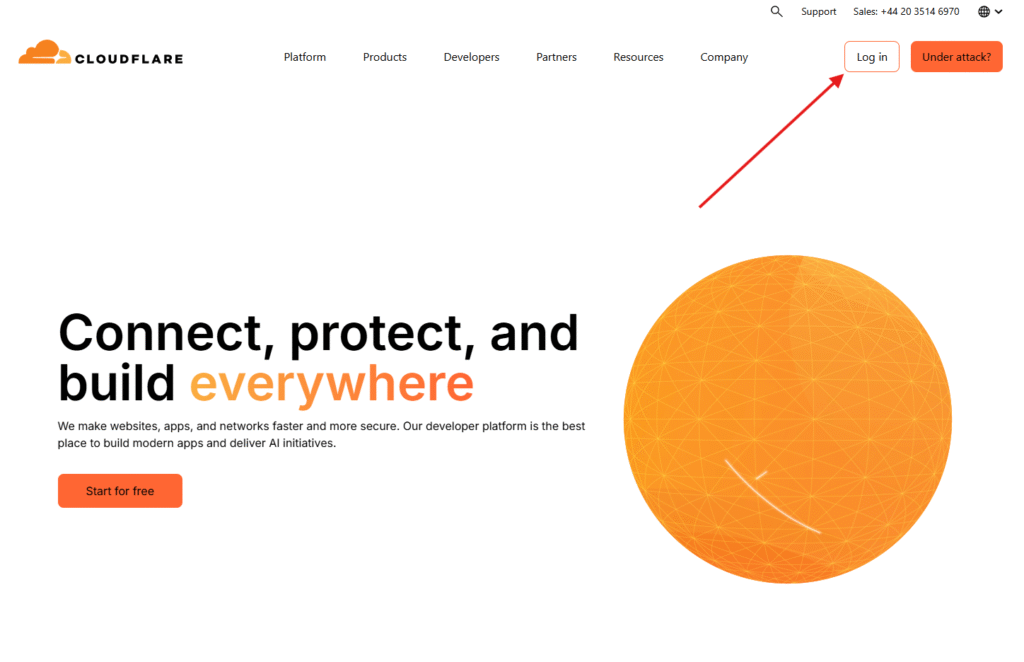
Step 1 Go to Cloudflare and log in
Head to Cloudflare.com and sign up or login if you already have an account with them.
Step 2 Add Your Website Domain
Once you’re logged into your account. We need to add domain which you have for your website.
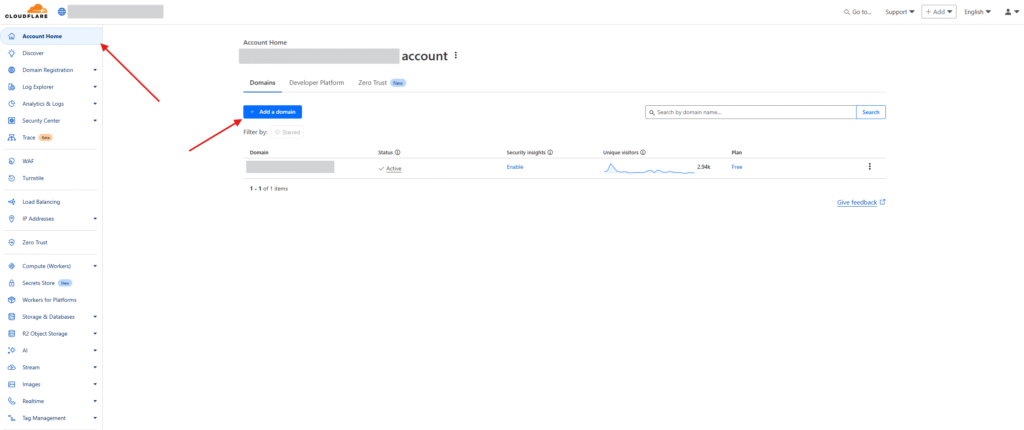
After you’ve clicked “Add a domain” next screen for you will appear
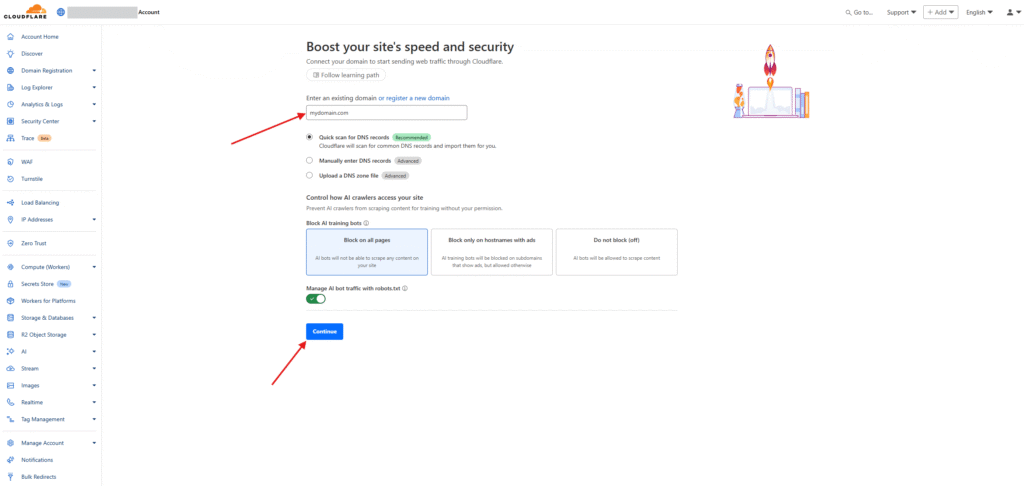
Select “recommended” option for DNS zone scanning and if you prefer you can also block AI models not to read your website. What it means, is once someone with AI model like ChatGPT makes a request, AI model could get context from your website.
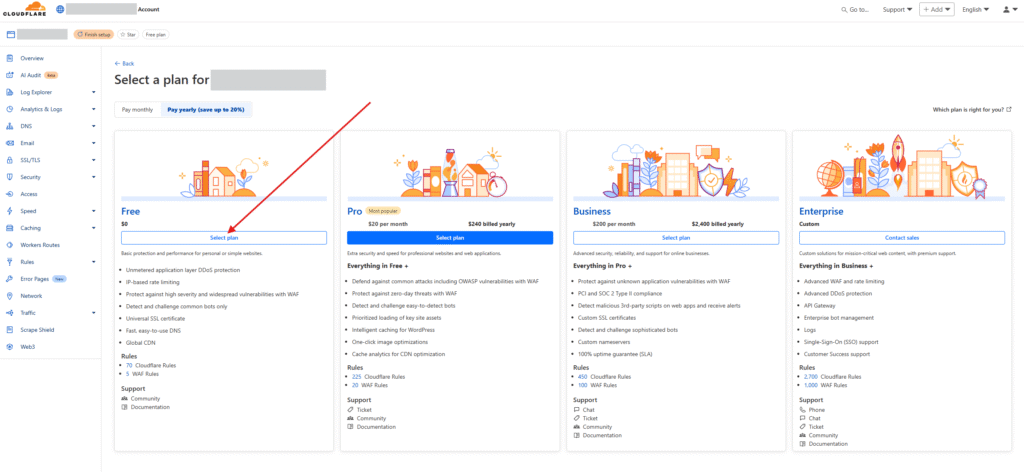
Step 3 Select the Free Plan
Within the next step, you will be given an option to select CloudFlare CDN plan. For all of the basic needs free plan is fully sufficient.
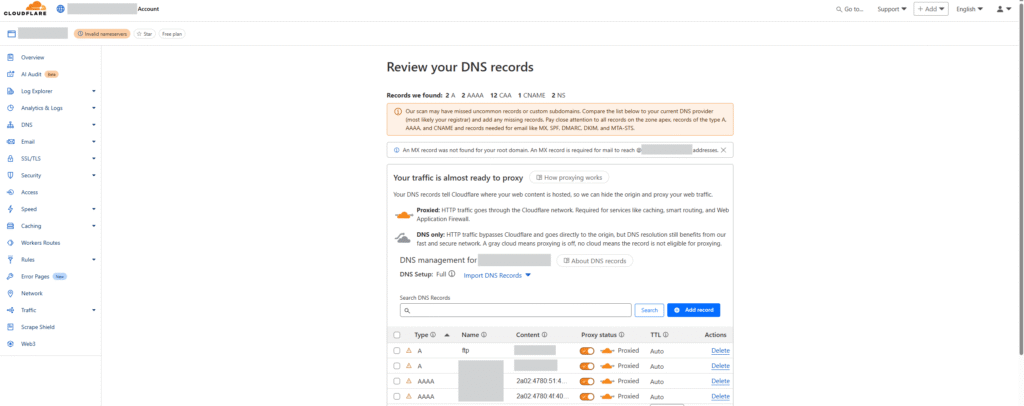
Step 4 Review DNS Records
By default for everyone they will scan the DNS settings of your current website. This step does not require your input just yet. You can scroll to the bottom of the screen and proceed to the next step.
Step 5 Update Nameservers where you purchased your domain
This is a very important step. In order for CloudFlare CDN to work, you need to point your domain to their provided custom nameservers at where you purchased your domain. I will be showing this example on Hostinger, as it’s where I’ve registered and purchased my domain.
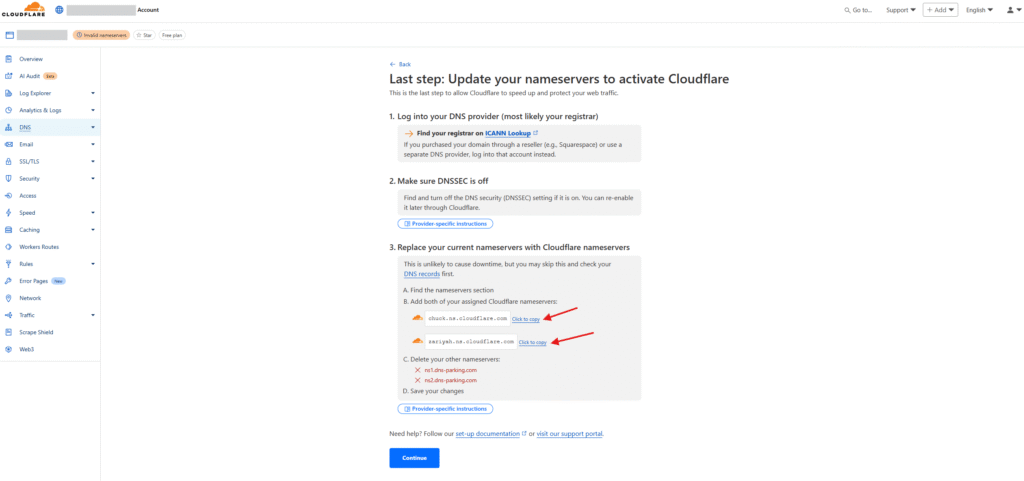
Copy both provided nameservers values by CloudFlare and let’s login to where your domain was purchased.
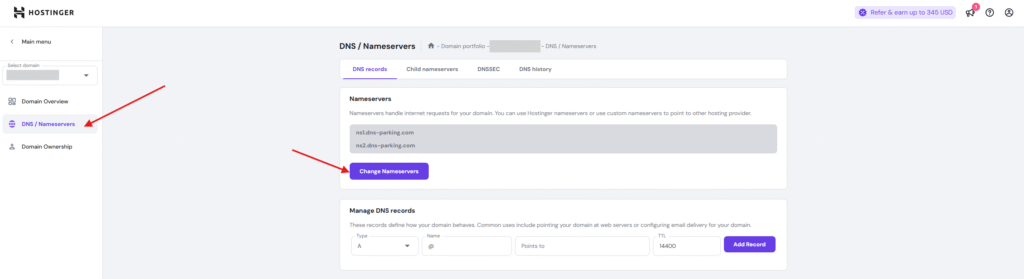
In the screenshot above, I’m at Hostinger where I can manage my DNS settings. Most of the hosting providers, allow us to manage our DNS records. Naming is kept quite similar at all hosting providers. Let’s hit change the nameservers and proceed.
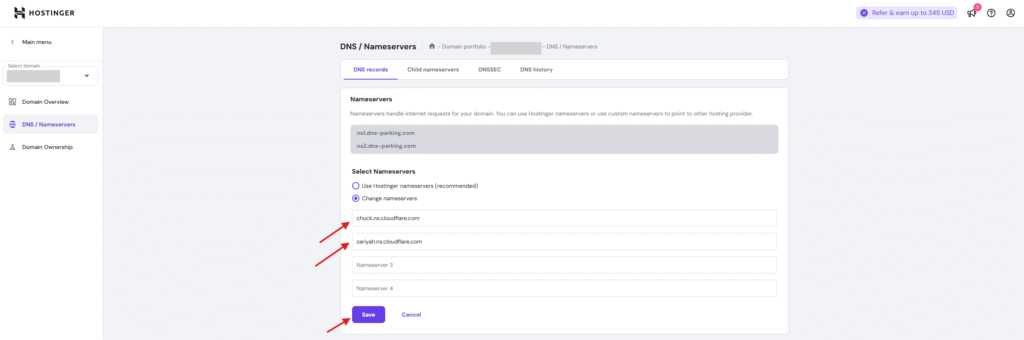
I have pasted the values CloudFlare provided to me and now all that’s left is to hit save.
Step 6 Wait for Propagation
All done! What’s left is for you to wait for the nameservers propagation and your website will work via CloudFlare CDN.
Things to note about propagation:
- During the propagation your website will not be reachable
- Propagation might take 2-3 hours. In very rare cases it will take up to 24 hours.
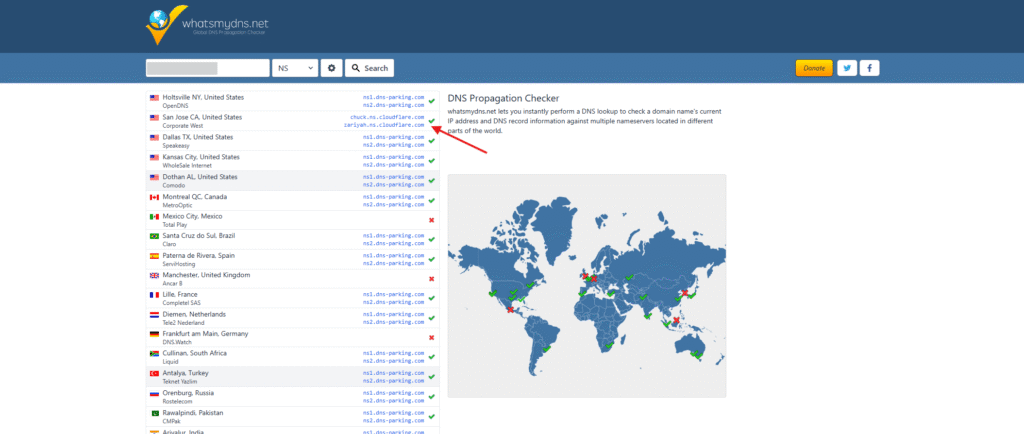
Verify the Setup
If you want, you can always check how’s the propagation going. There is a public tool called WhatsMyDNS. Enter the page, inside the drop-down select “NS” value and enter your domain name. In the list below, if you start seeing given CloudFlare nameservers values, that means in that location your new nameservers have already propagated.
If you’ve reached this step congratulations! As you’ve successfully activated CloudFlare CDN on your website and now it’s faster and more secured.